Face Detection - Google ML - Android Studio - Java
Detect Face using Google/Firebase ML Kit
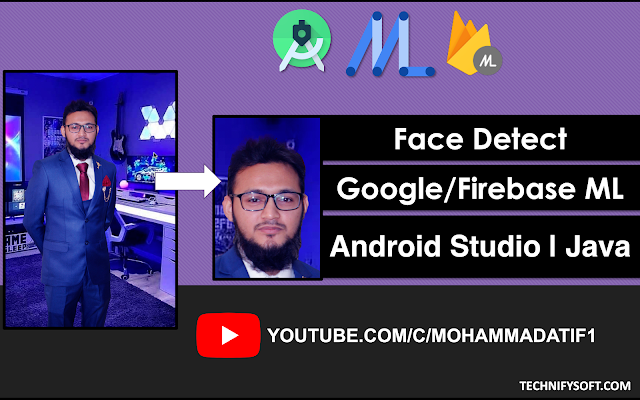
In this tutorial, we will detect the face(s) from an image. We will use to get the Bitmap from an image in the drawable folder, but we will also show how you may also get the Bitmap from Uri, ImageView, etc. Using the ML Kit Face Detection API, you can easily identify the key facial features & get the contours of detected faces. Note that the API only detects the faces; it doesn’t recognize the people.
With the ML Kit Face Detection API, you can easily get the information you need to perform tasks like embellishing selfies & portraits or generating avatar(s) from the user's photo. Since the ML Kit Face Detection API can perform Face Detection in real-time, you can use it in applications like video chat or games that respond to the player's expressions.
We will use the Android Studio IDE and the Java language.
>> Check For Java
>> Check For Kotlin
>> Check For Compose
Video Tutorial
Coding
build.gradle
dependencies {

    implementation 'androidx.appcompat:appcompat:1.4.2'
    implementation 'com.google.android.material:material:1.6.1'
    implementation 'androidx.constraintlayout:constraintlayout:2.1.4'

    //Add Face detect ML kit (offline version)
    implementation 'com.google.mlkit:face-detection:16.1.5'

    testImplementation 'junit:junit:4.13.2'
    androidTestImplementation 'androidx.test.ext:junit:1.1.3'
    androidTestImplementation 'androidx.test.espresso:espresso-core:3.4.0'
}
activity_main.xml
<?xml version="1.0" encoding="utf-8"?>
<ScrollView xmlns:android="http://schemas.android.com/apk/res/android"
    xmlns:app="http://schemas.android.com/apk/res-auto"
    xmlns:tools="http://schemas.android.com/tools"
    android:layout_width="match_parent"
    android:padding="10dp"
    android:layout_height="match_parent"
    tools:context=".MainActivity">

    <LinearLayout
        android:layout_width="match_parent"
        android:layout_height="wrap_content"
        android:orientation="vertical">

        <!--Original Image: To be used to detect face-->
        <ImageView
            android:id="@+id/originalImageIv"
            android:layout_width="match_parent"
            android:layout_height="wrap_content"
            android:src="@drawable/atif01"
            android:adjustViewBounds="true"/>

        <!--Button: Start detecting faces-->
        <Button
            android:id="@+id/detectFacesBtn"
            android:layout_width="match_parent"
            android:layout_height="wrap_content"
            android:text="Detect Face"/>

        <!--ImageView: Detected/Cropped Image-->
        <ImageView
            android:id="@+id/croppedImageIv"
            android:layout_width="match_parent"
            android:layout_height="wrap_content"
            android:adjustViewBounds="true"/>

    </LinearLayout>

</ScrollView>
MainActivity.java
package com.technifysoft.facedetect;

import androidx.annotation.NonNull;
import androidx.appcompat.app.AppCompatActivity;

import android.graphics.Bitmap;
import android.graphics.BitmapFactory;
import android.graphics.Rect;
import android.graphics.drawable.BitmapDrawable;
import android.net.Uri;
import android.os.Bundle;
import android.provider.MediaStore;
import android.util.Log;
import android.view.View;
import android.widget.Button;
import android.widget.ImageView;
import android.widget.Toast;

import com.google.android.gms.tasks.OnFailureListener;
import com.google.android.gms.tasks.OnSuccessListener;
import com.google.mlkit.vision.common.InputImage;
import com.google.mlkit.vision.face.Face;
import com.google.mlkit.vision.face.FaceDetection;
import com.google.mlkit.vision.face.FaceDetector;
import com.google.mlkit.vision.face.FaceDetectorOptions;

import java.io.IOException;
import java.util.List;

public class MainActivity extends AppCompatActivity {

    //UI Views
    private ImageView originalImageIv;
    private ImageView croppedImageIv;
    private Button detectFacesBtn;

    //TAG for debugging
    private static final String TAG = "FACE_DETECT_TAG";

    // This factor is used to make the detecting image smaller, to make the process faster
    private static final int SCALING_FACTOR = 10;

    private FaceDetector detector;

    @Override
    protected void onCreate(Bundle savedInstanceState) {
        super.onCreate(savedInstanceState);
        setContentView(R.layout.activity_main);

        //init UI Views
        originalImageIv = findViewById(R.id.originalImageIv);
        croppedImageIv = findViewById(R.id.croppedImageIv);
        detectFacesBtn = findViewById(R.id.detectFacesBtn);

        FaceDetectorOptions realTimeFdo =
                new FaceDetectorOptions.Builder()
                        .setContourMode(FaceDetectorOptions.CONTOUR_MODE_ALL)
                        .setLandmarkMode(FaceDetectorOptions.LANDMARK_MODE_ALL)
                        .build();

        //init FaceDetector obj
        detector = FaceDetection.getClient(realTimeFdo);

        //handle click, start detecting/cropping face from original image
        detectFacesBtn.setOnClickListener(new View.OnClickListener() {
            @Override
            public void onClick(View view) {
                /*I've shown all ways to get bitmap from all resources like drawable, uri, image etc use the one that you require,
                im using drawable, so will comment others*/

                //Bitmap from drawable
                Bitmap bitmap = BitmapFactory.decodeResource(getResources(), R.drawable.atif01);

                //Bitmap from Uri, in case you want to detect face from image picked from gallery/camera
                /*Uri imageUri = null;
                try {
                    Bitmap bitmap1 = MediaStore.Images.Media.getBitmap(getContentResolver(), imageUri);
                } catch (IOException e) {
                    e.printStackTrace();
                }*/

                //Bitmap from ImageView, in case your image is in ImageView may be got from URL/web
                /*BitmapDrawable bitmapDrawable = (BitmapDrawable) originalImageIv.getDrawable();
                Bitmap bitmap1 = bitmapDrawable.getBitmap();*/

                analyzePhoto(bitmap);
            }
        });

    }

    private void analyzePhoto(Bitmap bitmap){
        Log.d(TAG, "analyzePhoto: ");

        //Get smaller Bitmap to do analyze process faster
        Bitmap smallerBitmap = Bitmap.createScaledBitmap(
                bitmap,
                bitmap.getWidth()/SCALING_FACTOR,
                bitmap.getHeight()/SCALING_FACTOR,
                false);

        //Get input image using bitmap, you may use fromUri method
        InputImage inputImage = InputImage.fromBitmap(smallerBitmap, 0);

        //start detection process
        detector.process(inputImage)
                .addOnSuccessListener(new OnSuccessListener<List<Face>>() {
                    @Override
                    public void onSuccess(List<Face> faces) {
                        //There can be multiple faces detected from an image, manage them using loop from List<Face> faces
                        Log.d(TAG, "onSuccess: No of faces detected: "+faces.size());

                        for (Face face: faces){
                            //Get detected face as rectangle
                            Rect rect = face.getBoundingBox();
                            rect.set(rect.left * SCALING_FACTOR,
                                    rect.top * (SCALING_FACTOR - 1),
                                    rect.right * SCALING_FACTOR,
                                    (rect.bottom * SCALING_FACTOR) + 90
                            );
                        }

                        cropDetectedFaces(bitmap, faces);
                    }
                })
                .addOnFailureListener(new OnFailureListener() {
                    @Override
                    public void onFailure(@NonNull Exception e) {
                        //Detection failed
                        Log.e(TAG, "onFailure: ", e);
                        Toast.makeText(MainActivity.this, "Detection failed due to "+e.getMessage(), Toast.LENGTH_SHORT).show();
                    }
                });


    }

    private void cropDetectedFaces(Bitmap bitmap, List<Face> faces) {
        Log.d(TAG, "cropDetectedFaces: ");
        //Face was detected, Now we will crop the face part of the image
        //there can be multiple faces, you can use loop to manage each, i'm managing the first face from the list List<Face> faces
        Rect rect = faces.get(0).getBoundingBox(); //show second face

        int x = Math.max(rect.left, 0);
        int y = Math.max(rect.top, 0);
        int width = rect.width();
        int height = rect.height();

        Bitmap croppedBitmap = Bitmap.createBitmap(
                bitmap,
                x,
                y,
                (x + width > bitmap.getWidth()) ? bitmap.getWidth() - x : width,
                (y + height > bitmap.getHeight()) ? bitmap.getHeight() - y : height
        );

        //set the cropped bitmap to image view
        croppedImageIv.setImageBitmap(croppedBitmap);
    }
}


Comments
Post a Comment